“Microblading” (sometimes called Eyebrow Blading, or 3D Brows) is a technique that allows the artist to apply semi-permanent pigment (lasts 1-2 years) to the brow area, in strokes that mimic the natural appearance of brow hairs. The artist uses a specially designed pen to make very shallow scratches in the skin, in the shape of brow hairs. A natural pigment is then painted over this scratch, and allowed to absorb. When the skin closes, the pigment is trapped just below the surface, and is visible through the translucent top layers of skin.
The Procedure
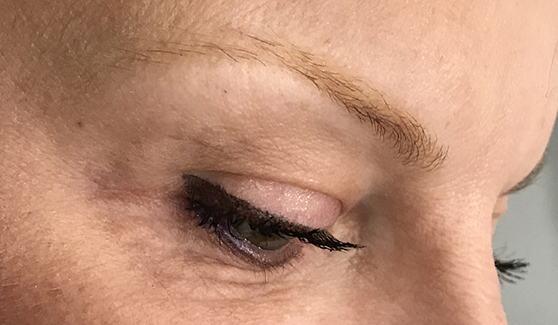
BEFORE MICROBLADING.
This series of photos show the stages of an eyebrow microblading procedure by Mr. Bodine, at the Brows By Bodine salon in Dallas, TX. This client had a previous eyebrow tattoo, which has faded to a very light golden tone
At the beginning of the procedure, Don will discuss the type of results the client wants, and he uses a cosmetic pencil to draw the shape of brows to be created. This process is a team effort, and the client will give feedback throughout the whole drawing process, to make sure the shape, length, and thickness fits their desired results. Unlike many in the microblading industry, Don Bodine does not rely on stencils, or “mapping” patterns to determine the placement of the brows. Those tools and techniques are designed around an “average” face, and don’t fit the facial features of a large majority of clients. For some people, a “classic” brow is exactly what they want. For others, it isn’t. Don draws on two decades of experience as a portrait artist to create the brow shape that is perfect for each client’s individual face.
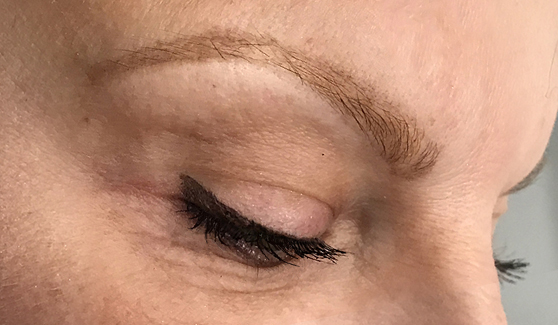
Mr. Bodine uses a brow pencil to design the desired brow shape
Once the size and shape of the brows is agreed on, Mr. Bodine will use a Sharpie marker to put dots around that shape. These dots will form a template, inside which the brow will be created.
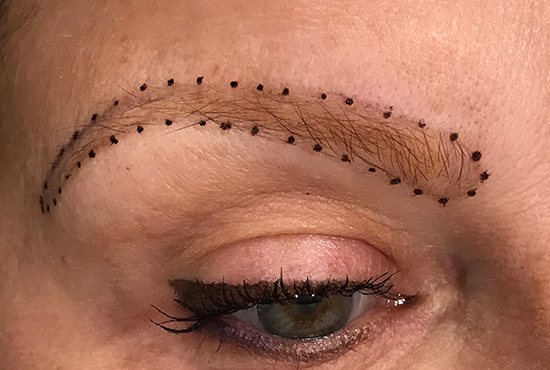
Mr. Bodine uses a marker to create a template to work inside of
Before microblading the eyebrows, a numbing cream is applied, and the client relaxes while the topical anesthesia takes effect. The type of numbing cream is chosen based on skin type. (One of the reasons some microblade artists struggle with getting the client completely numb, is that they try to use the same numbing products, for the same amount of time, on all skin types.). One of the main questions people have about microblading is: Does it Hurt? The answer is: NO, assuming the artist knows what they are doing, and isn’t in a rush.
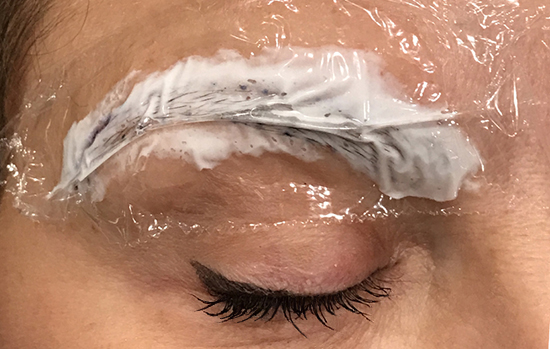
Client relaxes while the numbing cream takes effect
Correct microblading technique deposits the pigment just below the epidermis layer of the skin. The pigment will be visible just below the surface, and will last for 1-2 years, while the skin gradually exfoliates it away.
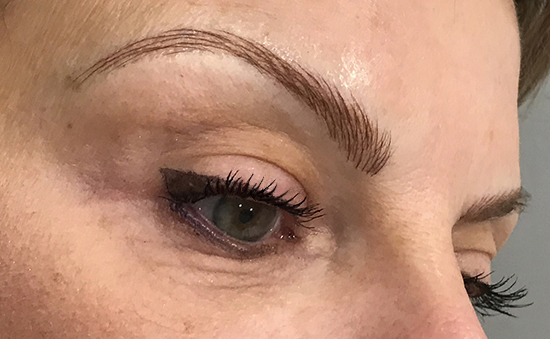
Freshly microbladed brows!
The healing process is typically a week, but varies from person to person. Mr. Bodine will provide each client a set of instructions for how to protect the brow area during the healing process, depending on the person’s skin type.
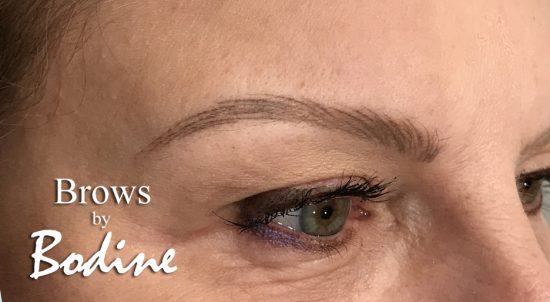
HEALED Microbladed brows.
Notice that the color has become less red and intense from immediately after the procedure.
The original microblading procedure is done in two sessions, scheduled four weeks apart. The first session is where the artist will design the brow shape, and apply the first layer of brow strokes. These strokes are applied so that they do not overlap, or crisscross. During the second session, a second layer of strokes can be applied that crisscross the first layer at a slight angle, to create the appearance of full, natural brows. The second session also allows the artist to fine-tune the color from the first session.
The Healing Process
During the first week after each session, the color of the brows will appear darker and more intense. This is the time where a tiny scab has formed over the scratch. These scabs will naturally flake away after about a week (for some people it takes 5 days, and for others it can take two weeks, depending on age, skin thickness, and how fast each individual heals). Once they have naturally dissolved and flaked away, the color of the microblade strokes will soften by about 40%. This also varies, depending on how thick, thin or transparent the skin is. The second session allows the artist to adjust the color, to get the ideal tone. The final, healed results of eyebrow microblading are not visible until at least one week afterwards. The healed results are softer and lighter than immediately following the procedure. When you are choosing the right microblade artist to create your brows, make sure their before-and-after example photos include HEALED results. It is extremely common in the microblading industry, for the artist to show an example of their work, which was taken immediately after the procedure…. NOT after the full healing process. Sometimes showing the unhealed procedure in unavoidable, if the client is unable or unwilling to come back for a final check-in after healing. But, when you are looking at an artist’s work, be sure they have lots of examples of healed microblade brows. One of the primary skills of an artist who does the best microblading is learning (by lots and lots of experience!) how to select a color that will look right AFTER healing, and the lightening process. Another skill is learning the correct depth of the stroke. If it is too shallow, the pigment will disappear after healing. If it is too deep, it will look fuzzy and blurry. Neither of these unsatisfactory results is visible until AFTER healing. So, you must see healed results to know what you can expect from a microblade artist.
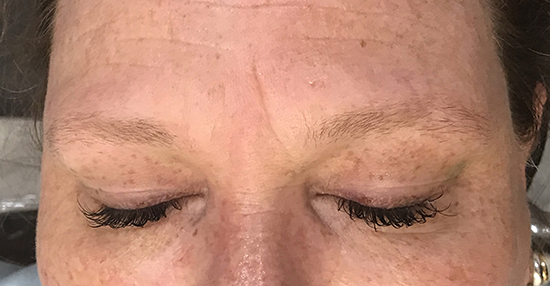
Before Microblading
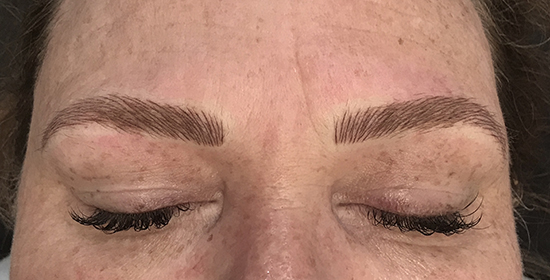
Immediately after microblading the eyebrows, the brow strokes will appear darker
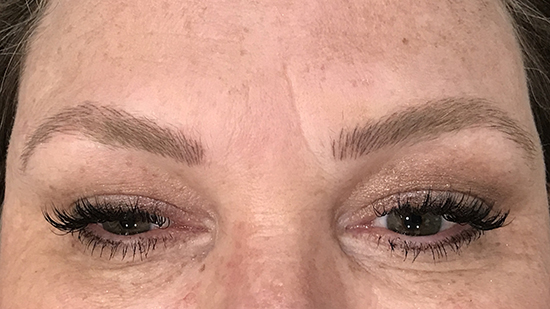
Once fully healed, the color will soften (typically by about 40%)
The Brows by Bodine salon offers premium quality eyebrow microblading in the Dallas, DFW area.